
A. Get Started
- Look for “CB – Form Builder Pro” on Shopify marketplace https://apps.shopify.com/
- Install the app
- Choose app plan (check screenshot)
- Add a form (check screenshot)
- Adjust styles, copies, behaviors,… (check screenshot)
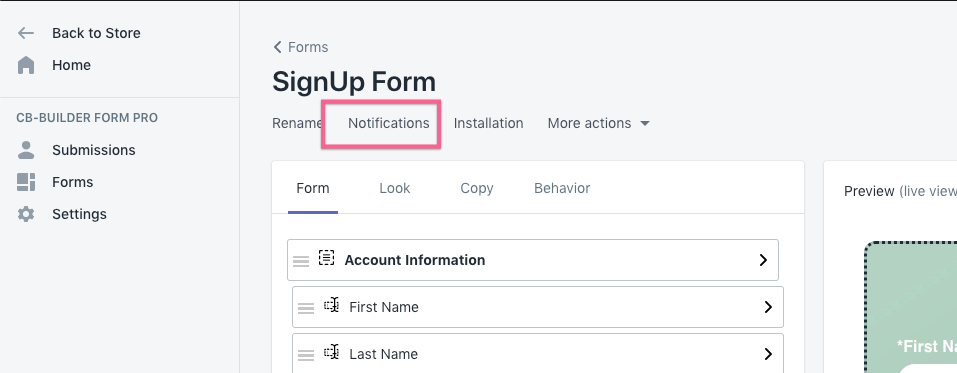
- Setup Notifications: email or slack notification (check screenshot)
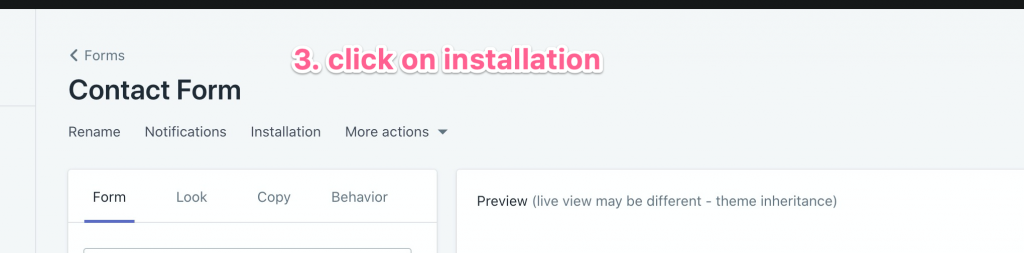
- Install the form to your theme + page (check screenshot)
- Click on the preview link to check your form
- Congrats!!
B. Setup SMTP
“The Simple Mail Transfer Protocol (SMTP) is a communication protocol for electronic mail transmission. As an Internet standard, SMTP was first defined in 1982 by RFC 821, and updated in 2008 by RFC 5321 to Extended SMTP additions, which is the protocol variety in widespread use today”.
WIKI
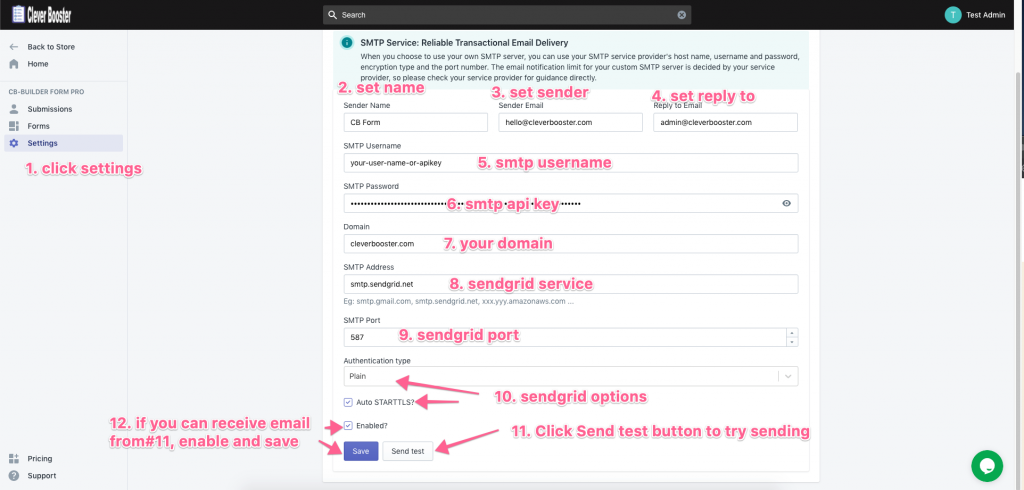
CB-Form builder pro sets [email protected] as default sender email. But you can set your own sender (eg. [email protected]) with SMTP configuration here.
If you have an SMTP service, you can check their guidance for SMTP credentials (google “{your provider} + SMTP credentials”). You are fresher at SMTP, you can register a free plan account at sendgrid.com. (SendGrid’s guidance).
You can follow these steps in this screenshot to setup SMTP with SendGrid
(Ref links: AWS SES, Sendgrid, Mandrill,…)
C. Setup reCAPTCHA
reCAPTCHA protects your website from fraud and abuse. CB-Form Builder Pro just supports Version 2.
To use reCAPTCHA, you have to upgrade your plan to Pro Plan or higher.
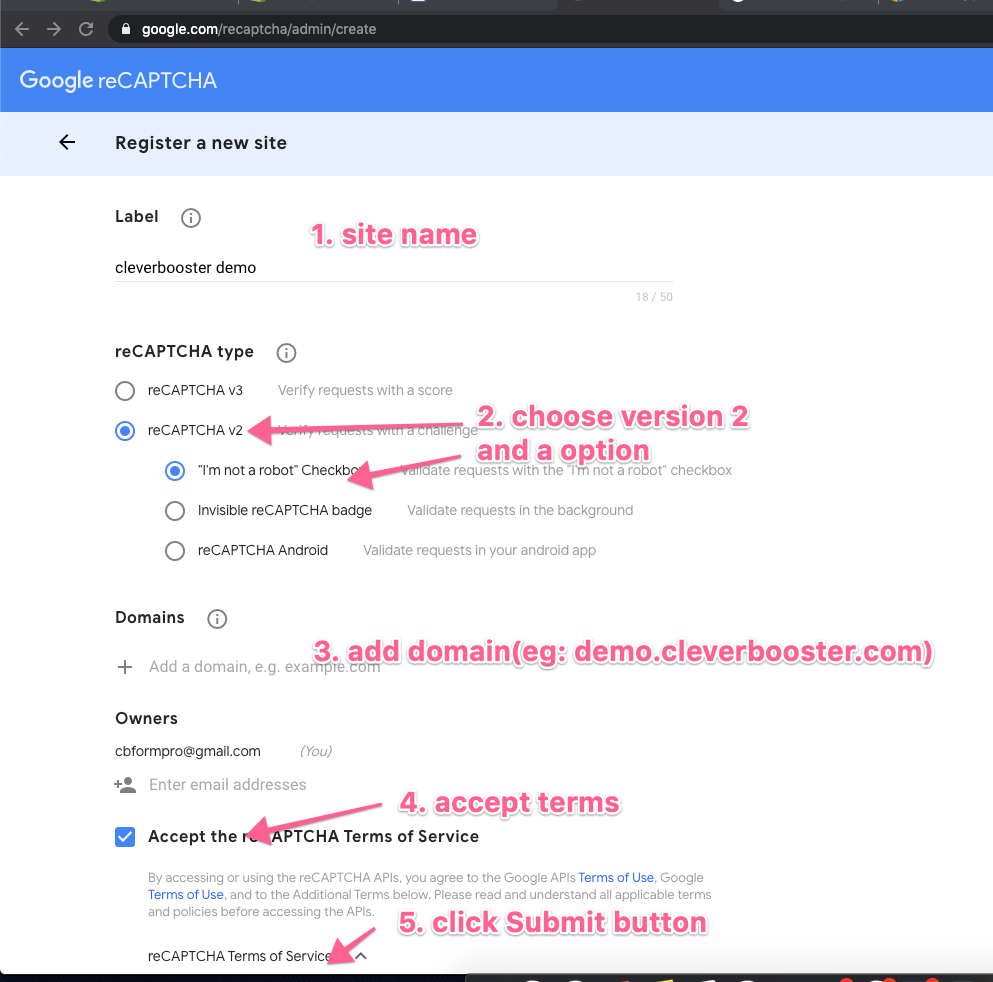
Please follow these steps to configure reCAPTCHA:
- Register a new site on recaptcha
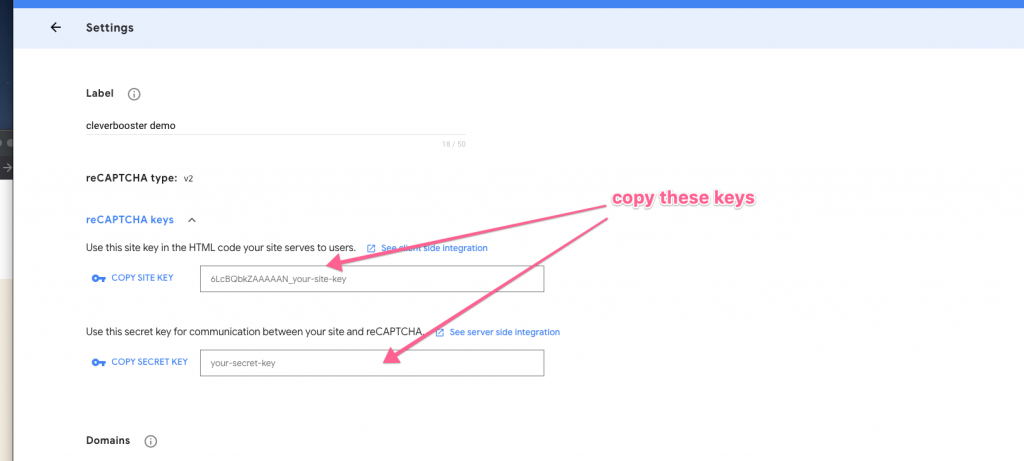
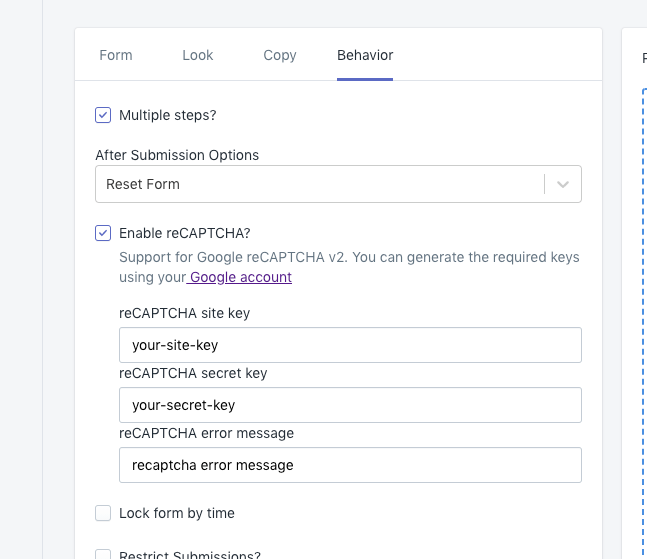
- Copy your site key, secret key and then paste to your form behavior tab
D. Auto-responding emails
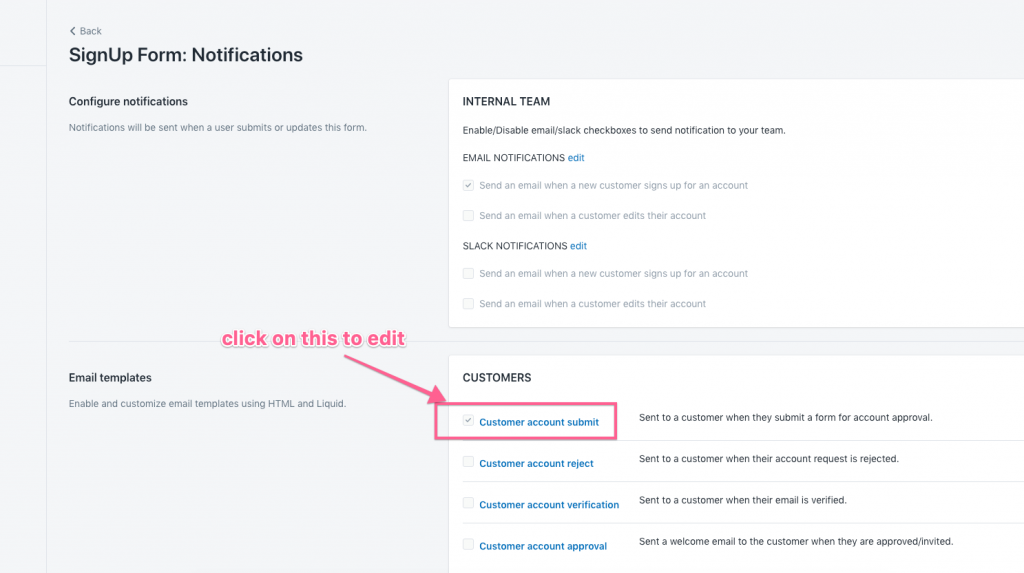
You can set up auto-responding emails for each form separately when:
- After a user submits a form with 1 email field, it would send Customer Account Submit email
- After administrators/you reject an application/submission. it would send Customer Account Reject email to a user
- After the user accepts/verifies Customer Account Submit email, it would send Customer Account Verification email to a user
- After administrators/you approve an application/submission, it would send Customer Account Approval email to a user
Follow these steps to enable auto-responding email
- Click on notification tab on the form setting.
- Click on email type to edit
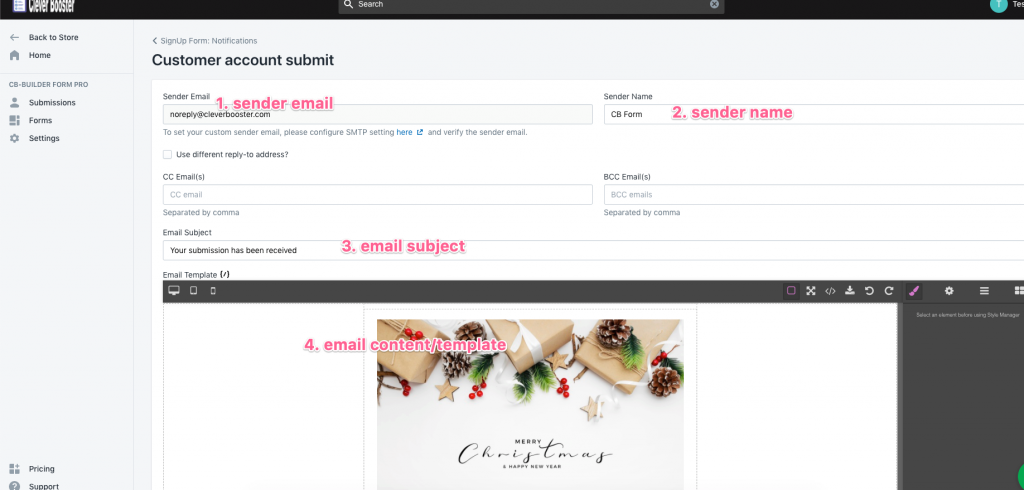
- Configure the email setting (you can only edit Sender email, if you have enabled SMTP config, and verify the sender email)
- Click on any element on the email template and adjust it
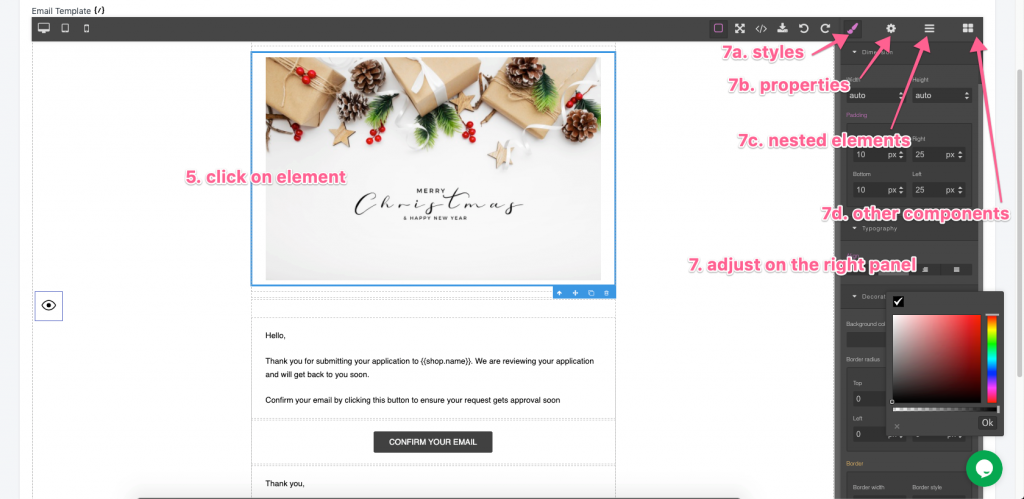
- Submission’s data can be filled with liquid variables (click on variable tag to copy and paste to the email content)
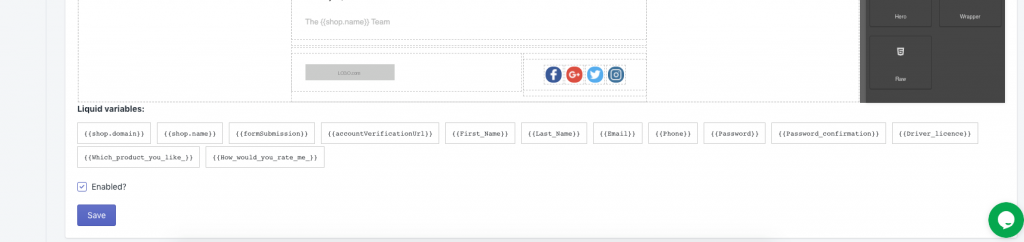
- Click on “eye” icon on the left to send a proof email

- Check enabled checkbox and save.
E. Conditional Logic
You need to upgrade to Pro Plan or Advanced Plan to use this feature
Admin can set conditional logic to show/hide a field or a group of fields by follow these steps:
- Click on the field bar on editing mode
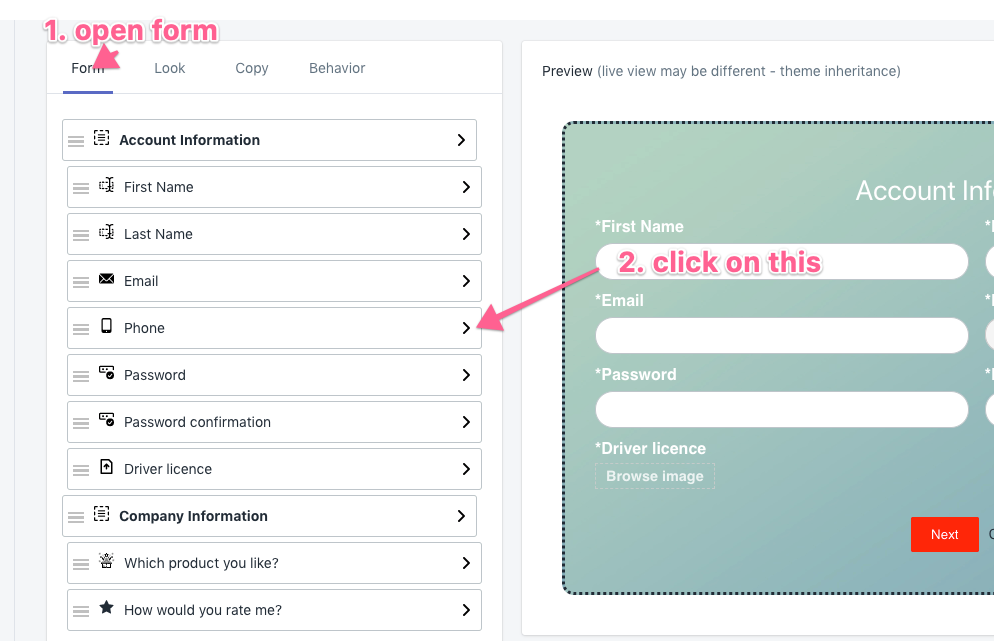
- Open advanced tab and set condition
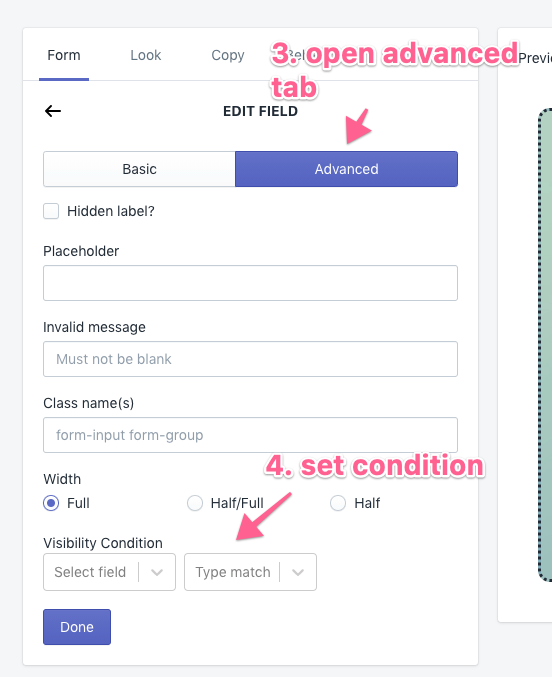
- Done
Shopify Headless Commerce
You need to Advanced Plan to use this feature.
- Open this link https://forms.cleverbooster.com/settings/domains to add your custom domain
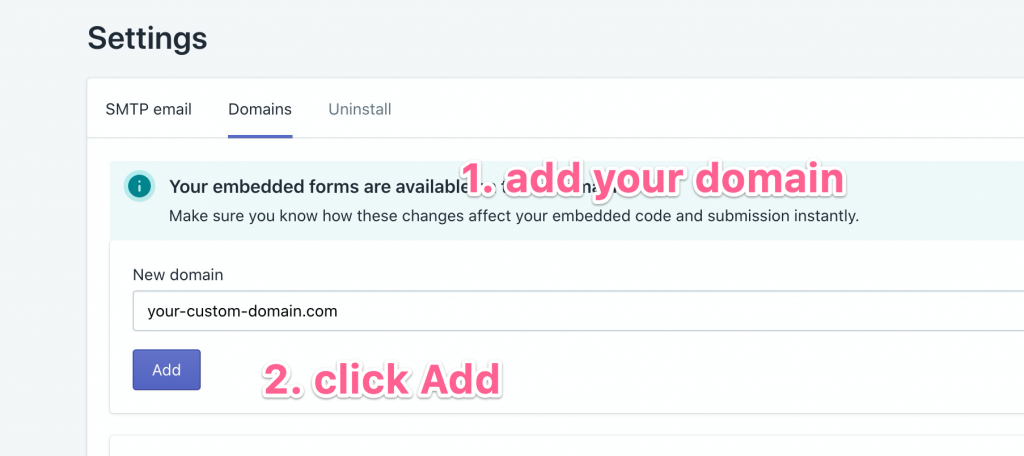
- Open form & click installation
- Check “a custom domain” checkbox

- Copy the snippet and paste into your html file
- Done!