
Set up and customize booking emails
Control customer booking emails, edit templates, notify your team, and check what was sent.
On this page
Booking emails can confirm an event or service, remind customers, and follow up after a visit. Email is available without connecting a separate sender. Choose which messages each event sends, then edit the shop-wide templates.
Choose which emails to send
- Open Events/Services and select the event.
- Open Notifications and turn on the messages you need: confirmation, reminder, follow-up, updated booking, and cancellation.
- Save the event. Check the reminder and follow-up timing before relying on those messages.
These event settings decide whether a message is sent. The templates under Settings → Email templates decide what it says.
Edit and preview a template
- Open Settings → Email templates. If the list is empty, click Initialize Defaults to create the standard automations, or Create Automation to add one.
- Open a template. Edit its subject and body in the visual editor.
- Select a booking in the preview picker and click Preview to inspect the rendered email before saving.
- Click Save.
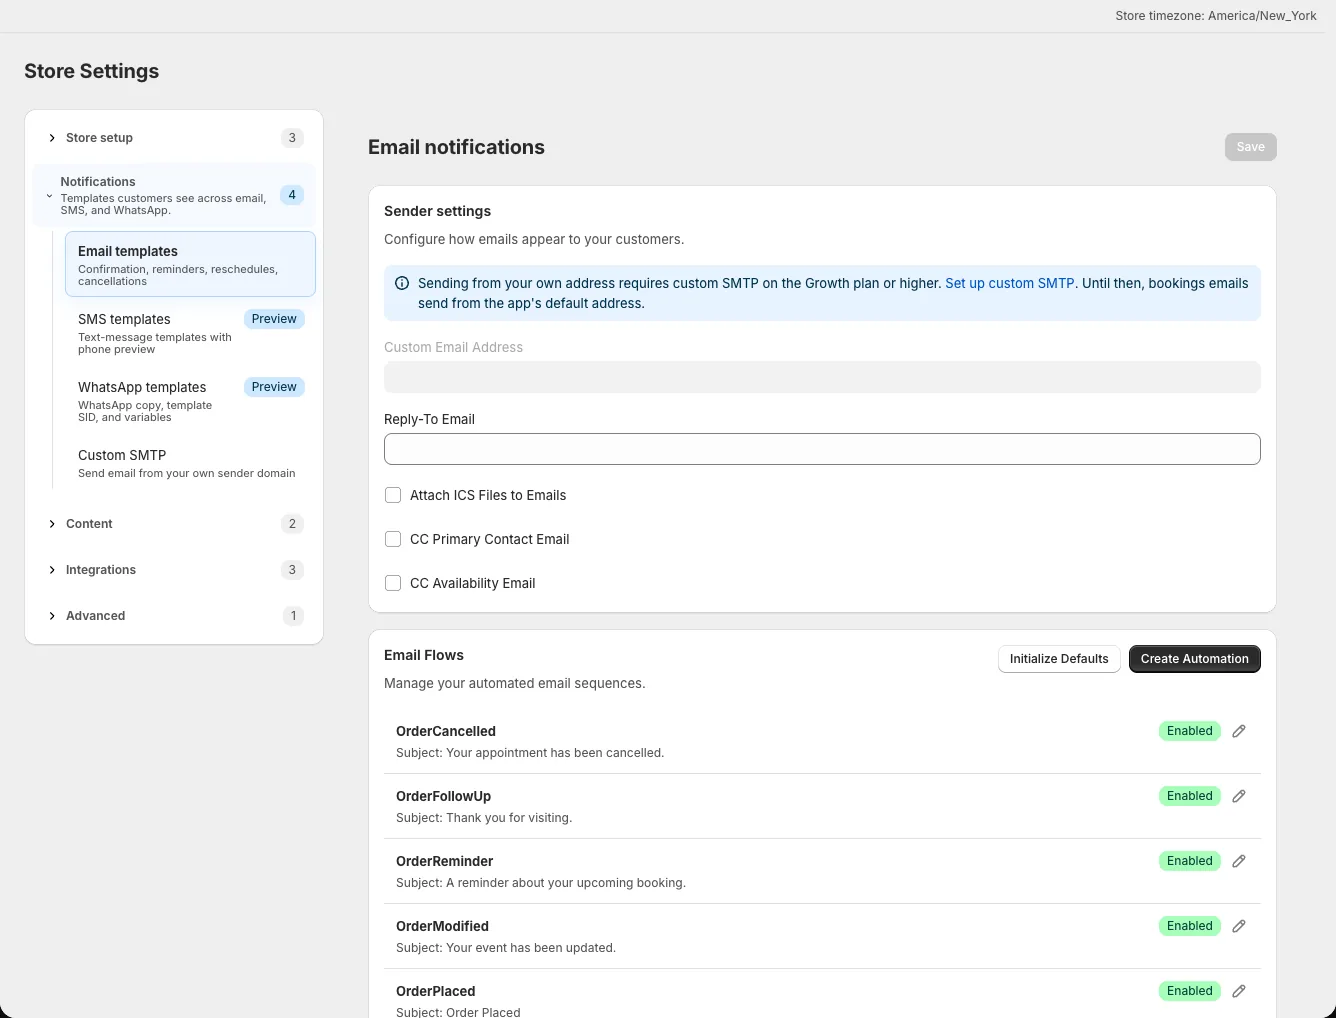
The editor can preview with sample data when no booking is selected. Choose a real demo booking when checking your wording and links.
Add booking details and useful links
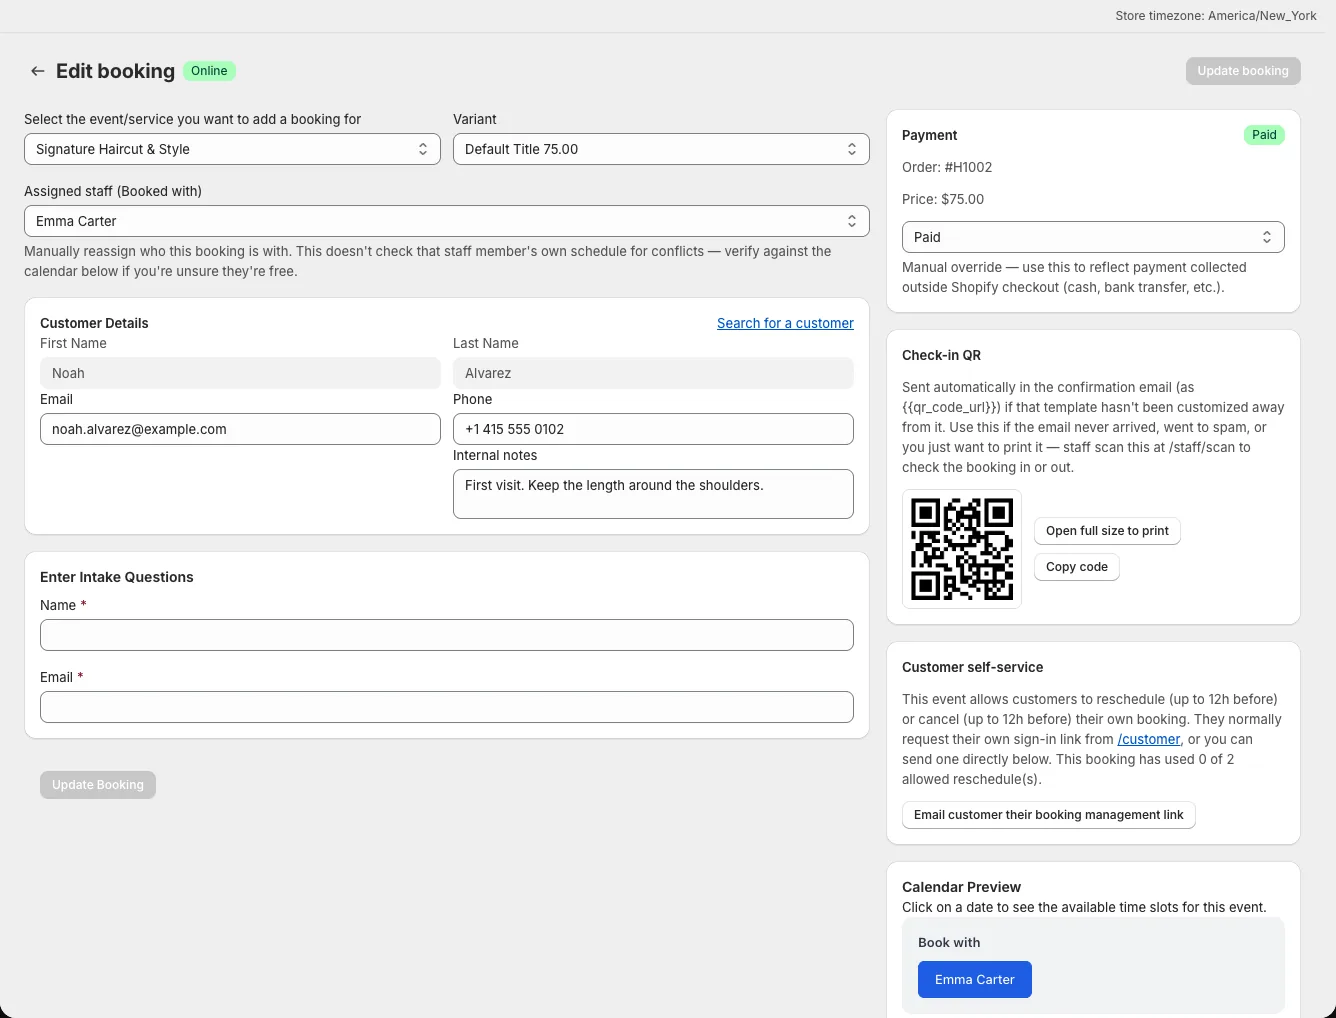
The editor's variable list shows the supported placeholders. Common ones include {{manage_booking_link}} for customer self-service, {{qr_code_url}} for check-in, and {{meeting_link}} when a connected meeting provider creates a link. Preview the result before sending.
Notify your team
Set Notification email(s) on the event's Notifications tab for its internal recipients. The app can use the store contact email when this field is empty. In Settings → Email templates → Sender settings, use CC Primary Contact Email or CC Availability Email where appropriate. Customer changes made through the portal also trigger internal alerts.
Check delivery and sender details
Open a booking and inspect Notification Log for channel, recipient, status, failure reason, and rendered content. Use View to inspect a message or Resend when appropriate. A resend sends the stored content again.
Sender settings also offers Attach ICS Files to Emails. Custom sender details require an active custom SMTP connection; those fields remain locked until it is enabled.