
View, search, reschedule, and cancel bookings
Find a customer booking, update its details, reschedule it, or cancel it from the Bookings page.
On this page
Use Bookings to manage appointments across all your events or services. Open a booking when you need its customer details, payment status, notes, or notification history.
Find a booking
- Open Bookings → All Bookings.
- Enter a customer name or email in the search field. You can also filter by Period, Event/Service, or Availability.
- Click Filter, then View on the matching row. Use Clear all to return to the full list.
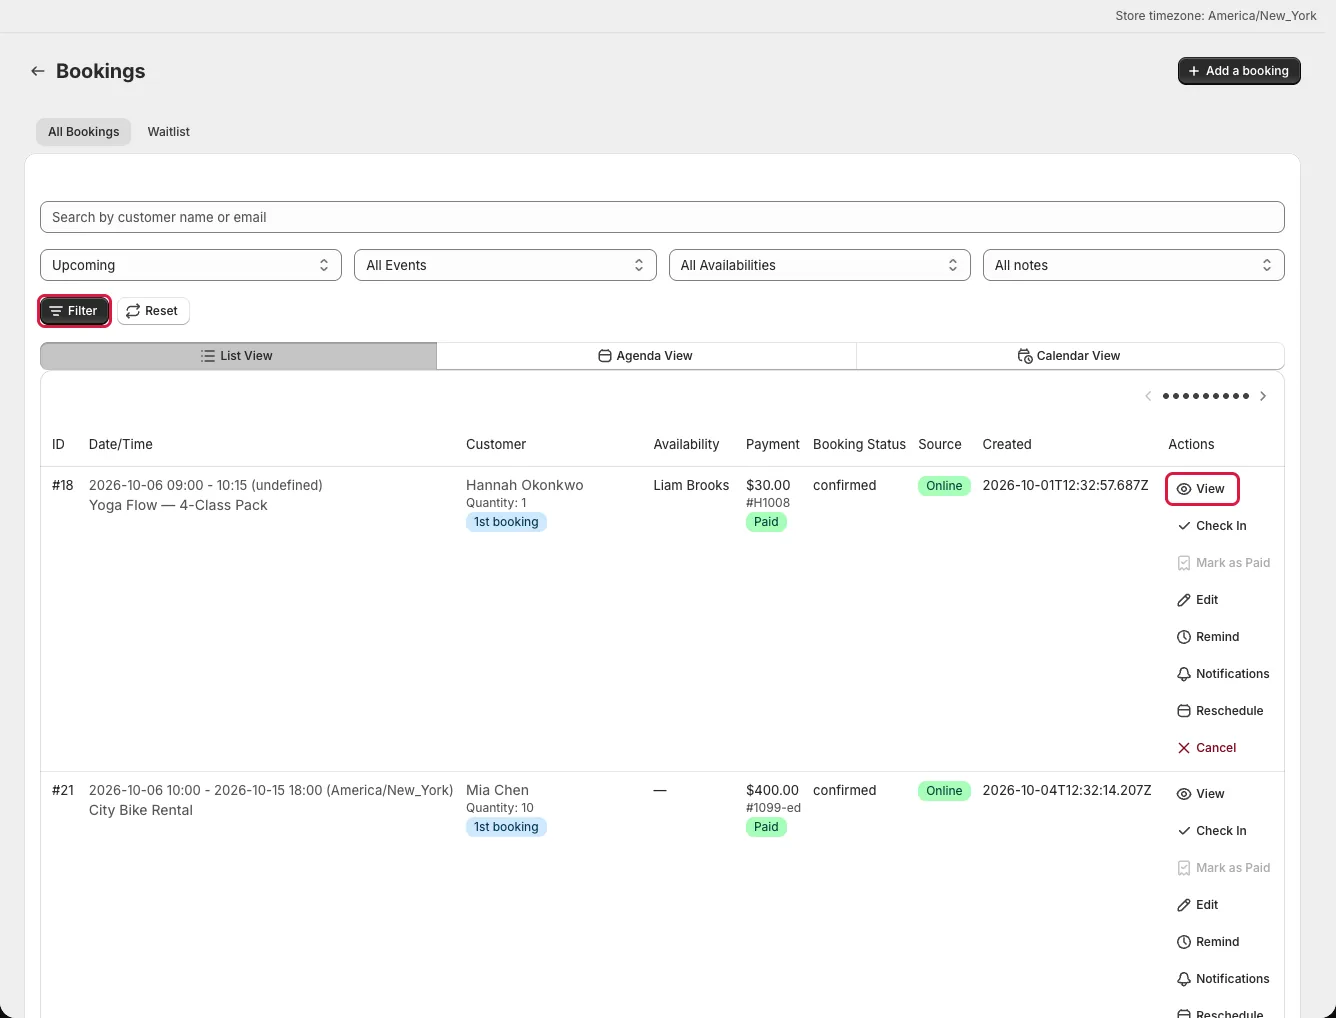
The list also shows booking status, payment, source, and an Overbooked badge when a capacity warning was recorded. Search also matches customer phone and event name. If a Shopify order number is all you have, open the order in Shopify to find the customer or booking details first; the list search does not search order numbers.
Review and edit the booking
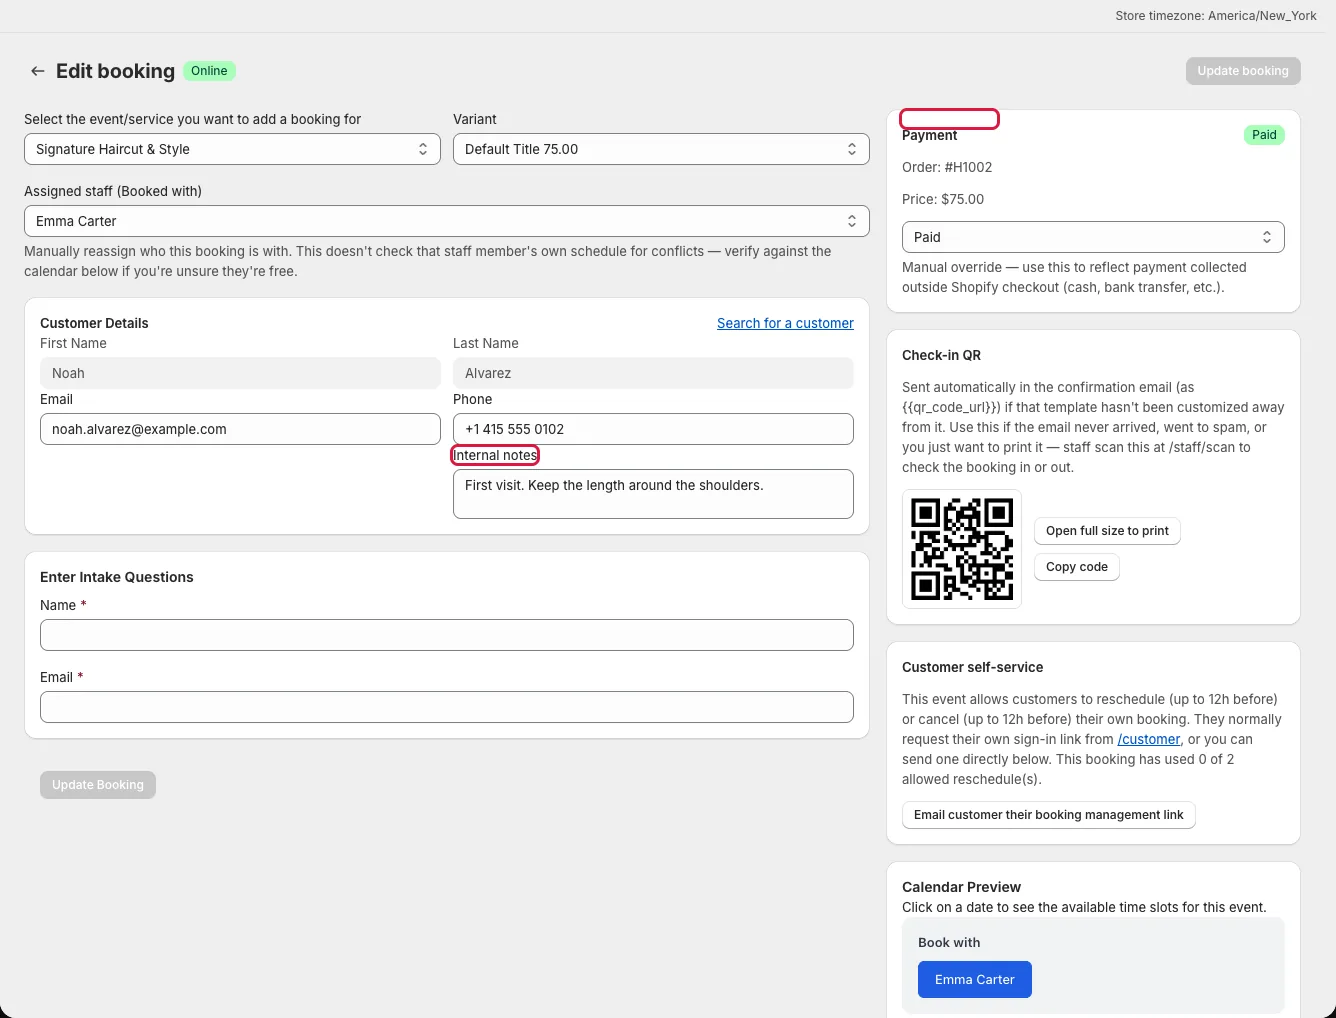
The detail page shows the booked event, customer, assigned staff or resource, schedule, quantity, intake responses, and Internal notes. It also shows Payment status, a check-in QR code, and the Notification Log. Save changes to booking details with Update booking.
Reschedule a booking
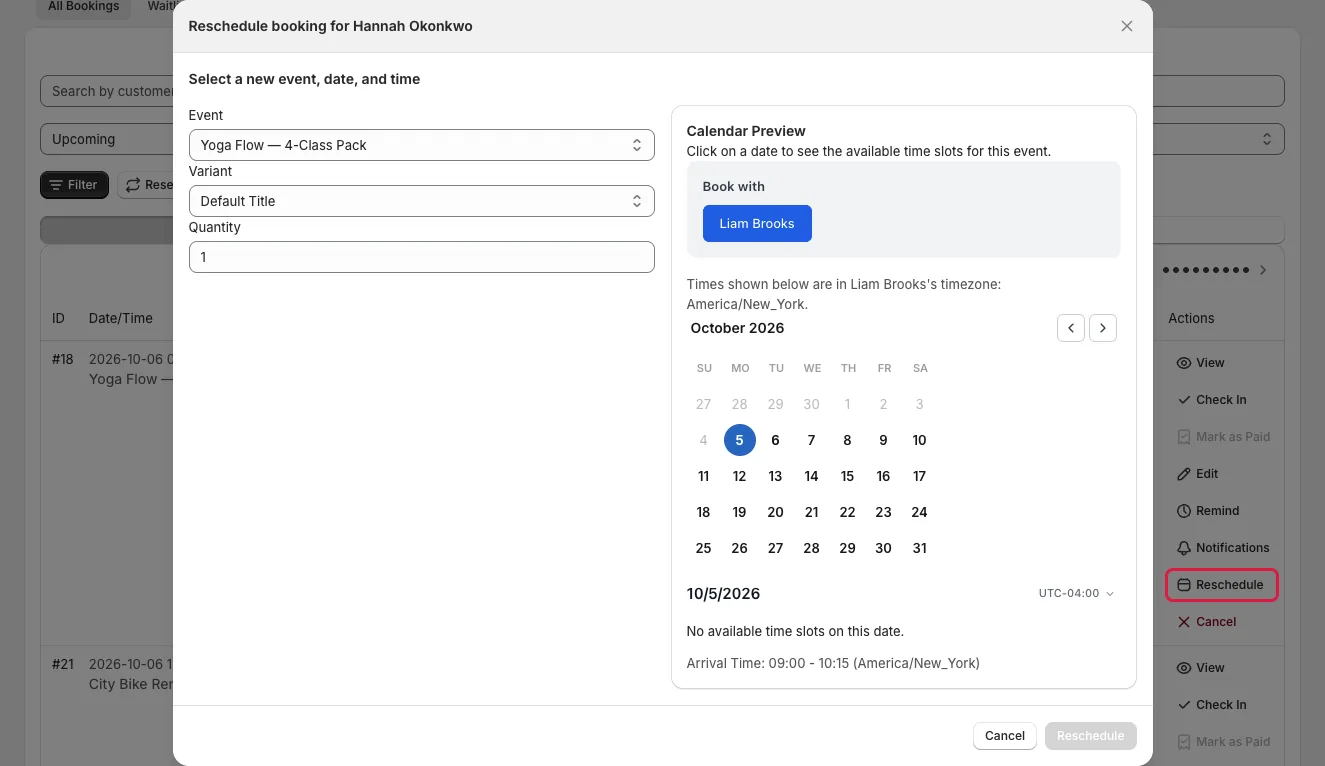
- Click Reschedule on the booking row, or edit the date and time on its detail page.
- Select a new time from the calendar and confirm the change. The app checks availability again before saving.
- Check the booking detail and Notification Log afterward. Customer messages depend on that event's Notifications settings.
An admin edit can raise a capacity warning rather than silently saving an overbooked time. Review every warning before choosing Save anyway. See Create a booking yourself for the distinction between creating and editing.
Cancel a booking
Click Cancel on an eligible booking and review the confirmation. The dialog may offer Also refund this booking on Shopify if there is an eligible paid order. A shop-wide automatic refund setting can refund on cancellation without that checkbox. Read Refunds and payment status before cancelling a paid booking.
Cancellation frees the reserved capacity. If the event has a waitlist, an eligible waiting customer may be notified; the customer must still make a new booking. You cannot use the normal cancel action after check-in or once the appointment has started.
Understand an Overbooked badge
Overbooked indicates that a capacity warning was attached to the booking. It can result from a confirmed admin edit or from an online order that was paid even though capacity changed before processing. Open the booking to read the warning and arrange a suitable time with the customer.