
Automate work with Shopify Flow booking triggers
Build Shopify Flow workflows from booking lifecycle triggers and inspect dispatch activity.
On this page
CB Booking exposes nine triggers to Shopify Flow. Install Shopify Flow in your store, then choose the booking event that should start your workflow.
Choose a trigger
| Trigger | Fires when |
|---|---|
| Booking placed | A booking is created |
| Booking rescheduled | Its date or time changes |
| Booking cancelled | It is cancelled |
| Booking checked in | Attendance is checked in |
| Booking checked out | Attendance is checked out |
| Booking marked no-show | A no-show is recorded |
| Reminder sent | A booking reminder is sent |
| Follow-up sent | A follow-up is sent |
| Start time reached | The booking start time is reached |
Flow receives booking context such as IDs, status, customer and order references, times, quantity, price, and location. Inspect the fields available in the Flow editor before using one in an action.
Keep triggers enabled
- Open Settings → Webhooks → Shopify Flow.
- Confirm Enable Shopify Flow triggers is on, then click Save if you change it.
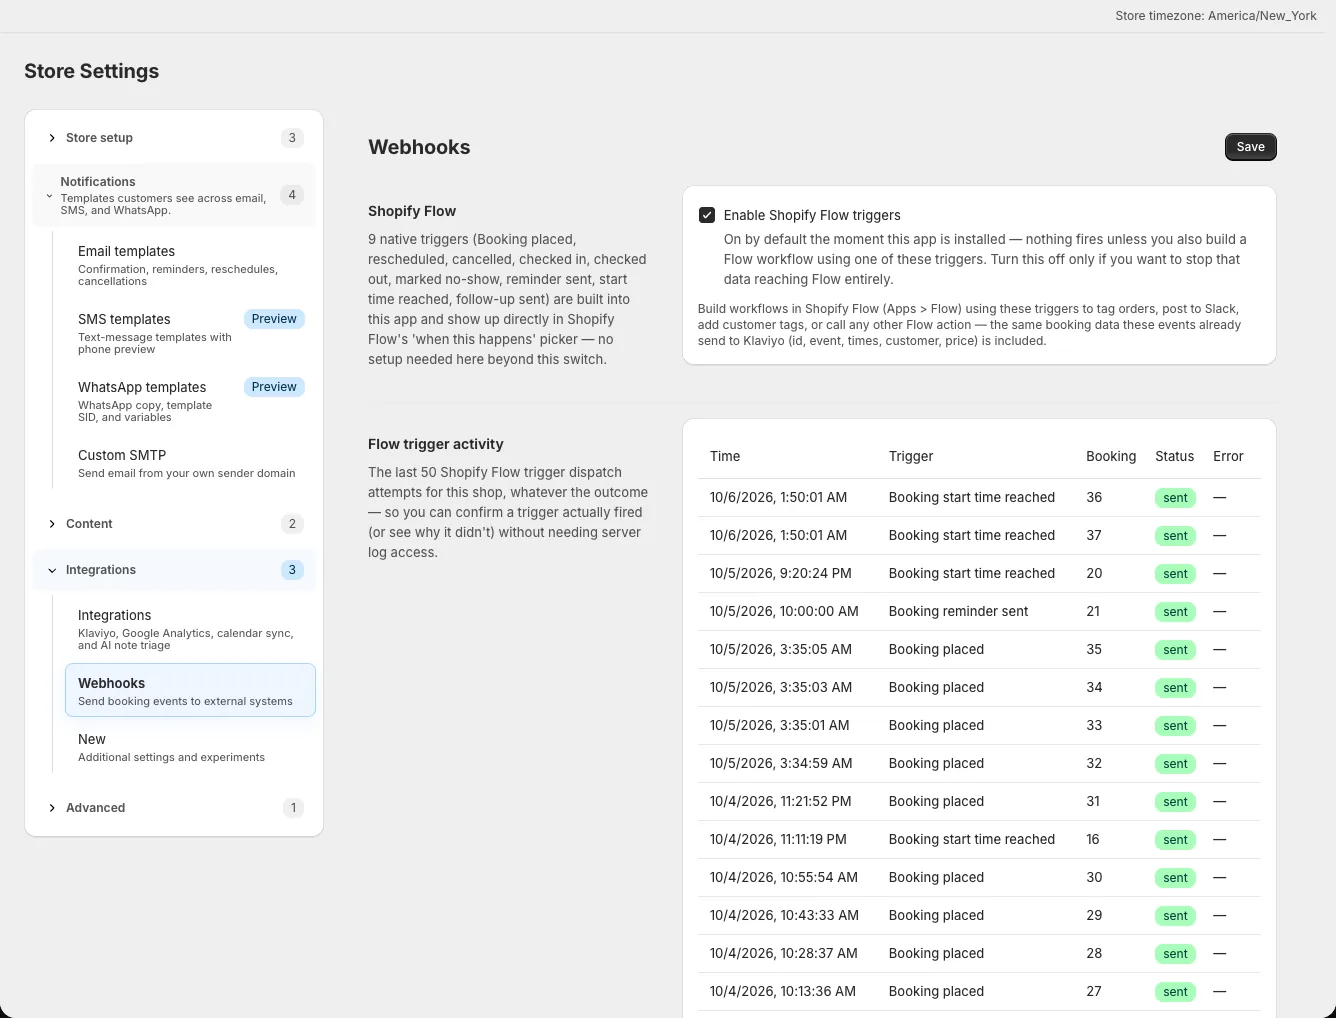
The switch starts on by default. A trigger still needs a workflow in Shopify Flow before it performs an action.
Build a workflow
Open Shopify Flow from Shopify admin, create a workflow, and select one of the app's booking triggers as the start condition. For example, use Booking cancelled to tag the related Shopify order for a follow-up. Configure the Flow action and test with a demo booking before enabling the workflow for customers.
Check dispatch activity
Return to Settings → Webhooks → Flow trigger activity. It shows the latest 50 dispatch attempts with sent, skipped, or error status and an error message where available. A sent trigger means the app dispatched it; inspect Shopify Flow's run history to check whether your workflow action completed.