
Make sure your booking page is live
Check the event, Shopify product, theme embed, storefront switch, and a complete test booking before launch.
On this page
Use this checklist after creating an event or service. A working preview does not by itself confirm that customers can book on the published storefront.
Check the event and product
- Open Events/Services and confirm that the event is Active. If it is Draft, open it and select Activate.
- In Shopify Admin, open the product connected to the event. Set its status to Active and make it available on the Online Store sales channel.
- Check that the product variant used by the event is the one you expect customers to buy.
A draft event stays hidden from the storefront even when the product is active. Activating an event does not publish its Shopify product for you.
Check the published theme
- Open Online Store → Themes → Customize for the published theme.
- In the theme editor's left sidebar, select the App embeds icon, turn on CB Booking & Rentals, and select Save.
- In the app, open Settings → Theme and check Enable Storefront.
The embed is set per theme. If you have just published a different theme, repeat this check on that theme. For theme-specific placement, see Add the widget to your theme.
Check the widget on the product page
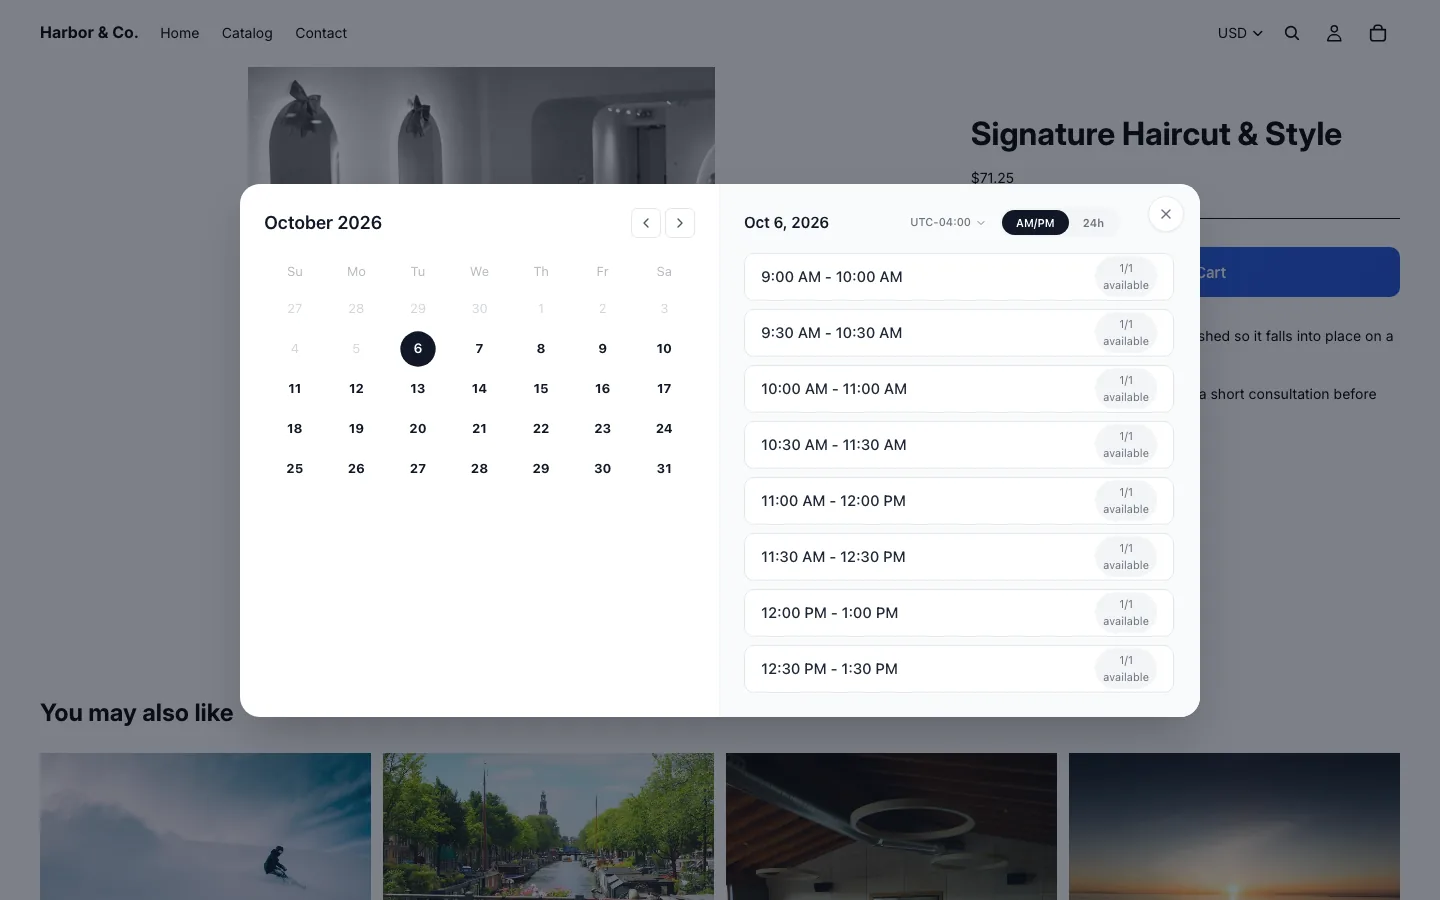
Open the live product URL as a customer. The booking widget should show a calendar or date range picker appropriate to the event's mode and selectable availability. Pick a date and time or range and follow the booking action. If no dates or slots appear, inspect the assigned availability, booking window, and capacity in No slots available.
Place a test booking
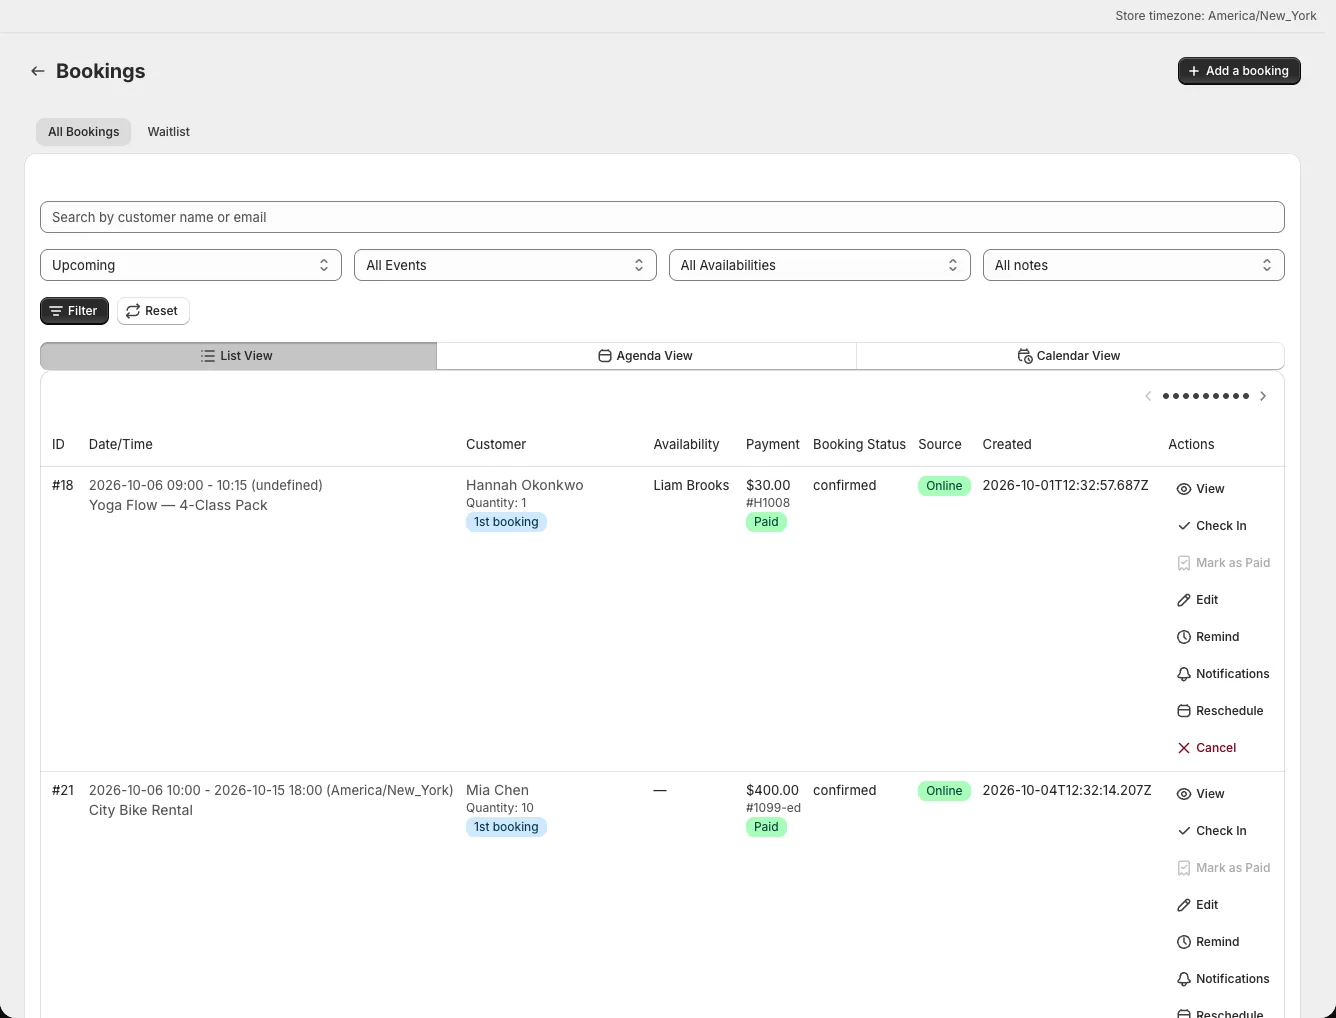
Use a test customer and the payment flow configured for this event. For a checkout event, check the actual Shopify cart and checkout total before completing a test order. For a no-payment event, complete the widget's contact form. Then open Bookings → All Bookings and confirm the new booking appears with the expected time and payment state. Check its notification activity and your email template setup if you expect an email.
If something is wrong
Use Widget not showing if the product page has no widget, No slots available if the calendar is empty, or Notifications not arriving if the booking exists but no expected message arrived.